Multiple Tools = A Waste of Time
Most podcasters use audio editing tools to produce their podcast. If you aren’t shooting video (yet) for your podcast, this might not be the article for you. But. If you are, you should consider using Davinci Resolve for producing your podcast.
When we first started our podcast we used Cakewalk by Bandlab to record and edit our audio. It worked very well and it is free. Phoebe and I each had a track, and one for our music and guest audio. The audio workflow was clean. Editing was a little bit of a learning curve because it has so many powerful features.
Lights, Camera… Davinci Resolve!
However, once we started shooting video things got more complicated. I would export the tracks from Cakewalk, then import them into Davinci. This is where things started to break down for me. The audio was edited in two places, Cakewalk for the podcast, and Davinci for the video. If I cut any of the audio before I exported it, it wouldn’t sync with the video. Now I was doing twice as much work. I hate that.
Along with this awkward workflow, I began to experience weird software issues, and I was just about to reinstall everything when it struck me I had an opportunity for improvement.
Eureka!
What if I did the whole workflow in Davinci Resolve? It was a crazy idea, but it just might work. I had already committed to Davinci because it was a powerful, free program with an amazing community backing it, so I had nothing to lose to try this new workflow. Reddit forums were a pretty even split between: it works and it shouldn’t be done. Why not give it a try?
Mix-minus Bus

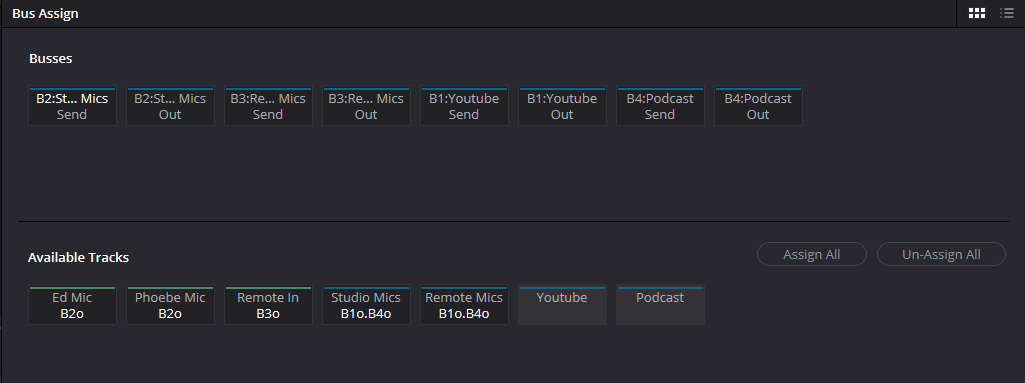
The first hurdle I had to figure out was how to route a mix-minus. We had a bunch of interviews coming up and guests hearing their own voice echo makes for a terrible experience. Because we use an audio interface instead of a dedicated podcasting interface I didn’t have a built-in mix-minus. By using flex bussing, I was able to route the studio mics to the input of the Zoom call and the recording bus, and the output of the Zoom audio to the recording bus. I even set up two buses for output – one for YouTube volume levels and the other for iTunes volume levels. I used a very similar setup as I did for Cakewalk.
It was like magic!
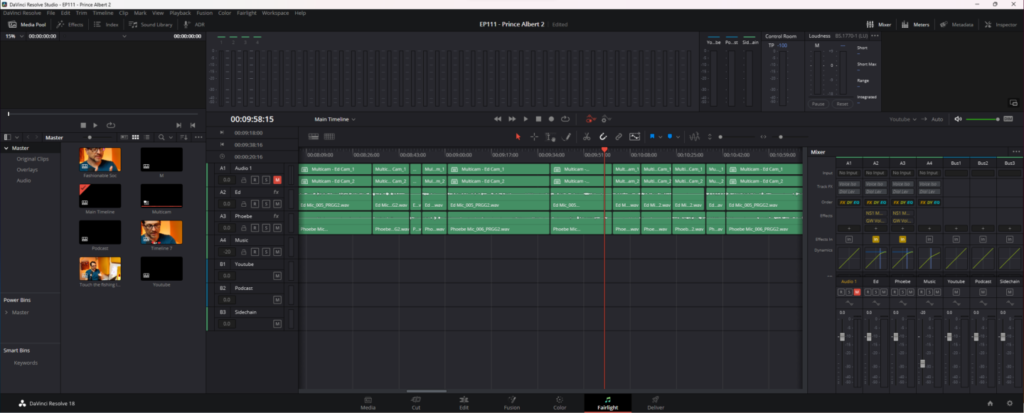
Once I figured out the audio, I was able to capture all three audio sources and lay down the tracks. I even created a “template” for our podcast setup. It’s not a true template, as it’s a project file that you open as read-only and then save with the project/episode name, but it works. (Davinci if you read this it would be nice to have dedicated project templates for repetitive work) #davinciresolve #podcast
Just add Video
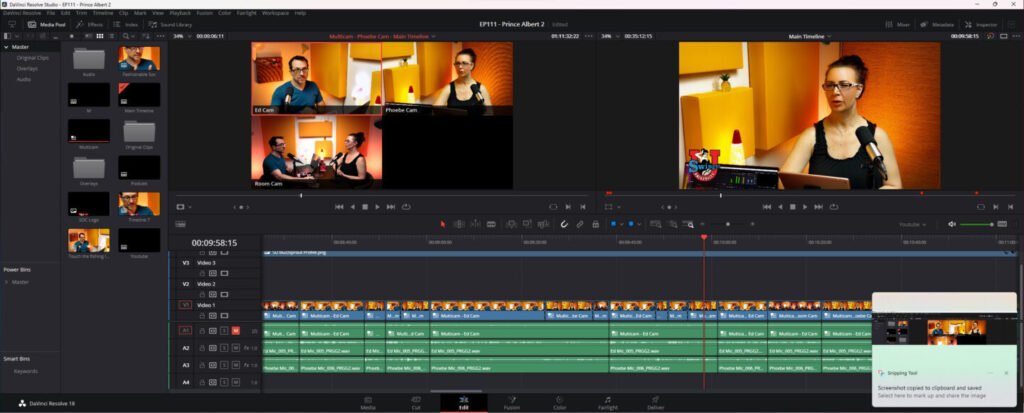
Because Davinci Resolve is primarily a video editor it’s a no-brainer to add video to your podcast audio. I grab all three camera angles, drop them into my media bin then sync them using the audio track in the video. I end up muting these audio tracks because the audio was also recorded using our studio mics, and that audio is much cleaner.
A few tricks I picked up.
- First clapping three times once the cameras and audio recording is rolling. This makes syncing the files MUCH easier.
- Using Multicam clips allows me to keep things in sync, and easily switch between the three camera angles using hotkeys as I’m editing.
- Set all three cameras up using the same white balance. This makes color correction easier.
- Create a new timeline for each expected output: YouTube, Podcast, and Social media posts. The video sources aren’t duplicated, just how they are edited.
- Each timeline can have its own format, size, and edits. I even change the audio mastering sound levels for each platform.
- Create your main timeline with everything, then using In-Out points you can copy-paste into new social media timelines and it will only grab the content between the points.
- If you record on one machine and edit on another. Use the archive project feature. It grabs everything and stores it on a remote drive, computer, or NAS. Then you can simply restore it on your other workstation.
It’s a Wrap
So far, this workflow has been fantastic, and it saves me so many steps. I’m really excited because Davinci 18.5 is coming out soon, and it will offer even more tools for me to use. AI tools for transcription, as well as subtitles (it works like Dscript, so editing will be easier, and grabbing sections of a video will be AMAZING!)
If you’re interested in learning Davinci Resolve, here’s a collection of my favorite YouTube resources.
Favorite Davinci Resolve Channels
If you’re interested in checking out Davinci Resolve I have two words for you: DO IT! It’s free, and it’s amazing!
https://www.youtube.com/@MrAlexTech
https://www.youtube.com/@CaseyFaris
https://www.youtube.com/@JasonYadlovski
https://www.youtube.com/@CreativeVideoTips
https://www.youtube.com/@PatrickStirling
Videos for Specific Techniques in Davinci Resolve
RESOLVE 18 CRASH COURSE – Davinci Resolve 18 Walkthrough [BEGINNER]
Captain Kirk (Peter McKinnon) is switching too (good Tips here): 10 Tips To Get You Started with DaVinci Resolve!
Social Media (create multiple timelines in the same project!)
Exporting Vertical Video & Tips in DaVinci Resolve 18 | Quick Tip Tuesday!
More Dynamic videos: How To Zoom in DaVinci Resolve – Resolve 16 Basics Tutorial
MultiCam: HOW TO SYNC MULTI-CAM IN RESOLVE 17 – DaVinci Resolve 17 Multi-Camera Sync Tutorial
Multi-Camera Editing in DaVinci Resolve 16 | Multicam Crash Course
Think After Effects: FUSION: THE ULTIMATE BEGINNERS GUIDE – DaVinci Resolve 18 Tutorial
How to Create Sub Clips in DaVinci Resolve 17 | Quick Tip Tuesday
Great effects: The World’s MOST POWERFUL Resolve Plugin is here. And it’s FREE.
18.5 New Dscript killer!!! Resolve 18.5 New Features – My Favorite New Resolve Updates!!!


